Introduction
Since I joined college I had a need to have more than one operating system available for some classes so I had a few options.
First I could simply run Oracle VM VirtualBox or VMware Workstation Player. This would work but since I have a ThinkPad X1 Carbon Gen5, it wouldn’t handle every ram and cpu usage from the VMs.
The second option would be to buy a new laptop but i didn’t want to overuse it.
So the third option, the one I choosed, was to buy a refurbished server and install ESXi or Proxmox creating a virtualization server giving more lifetime to the laptop.
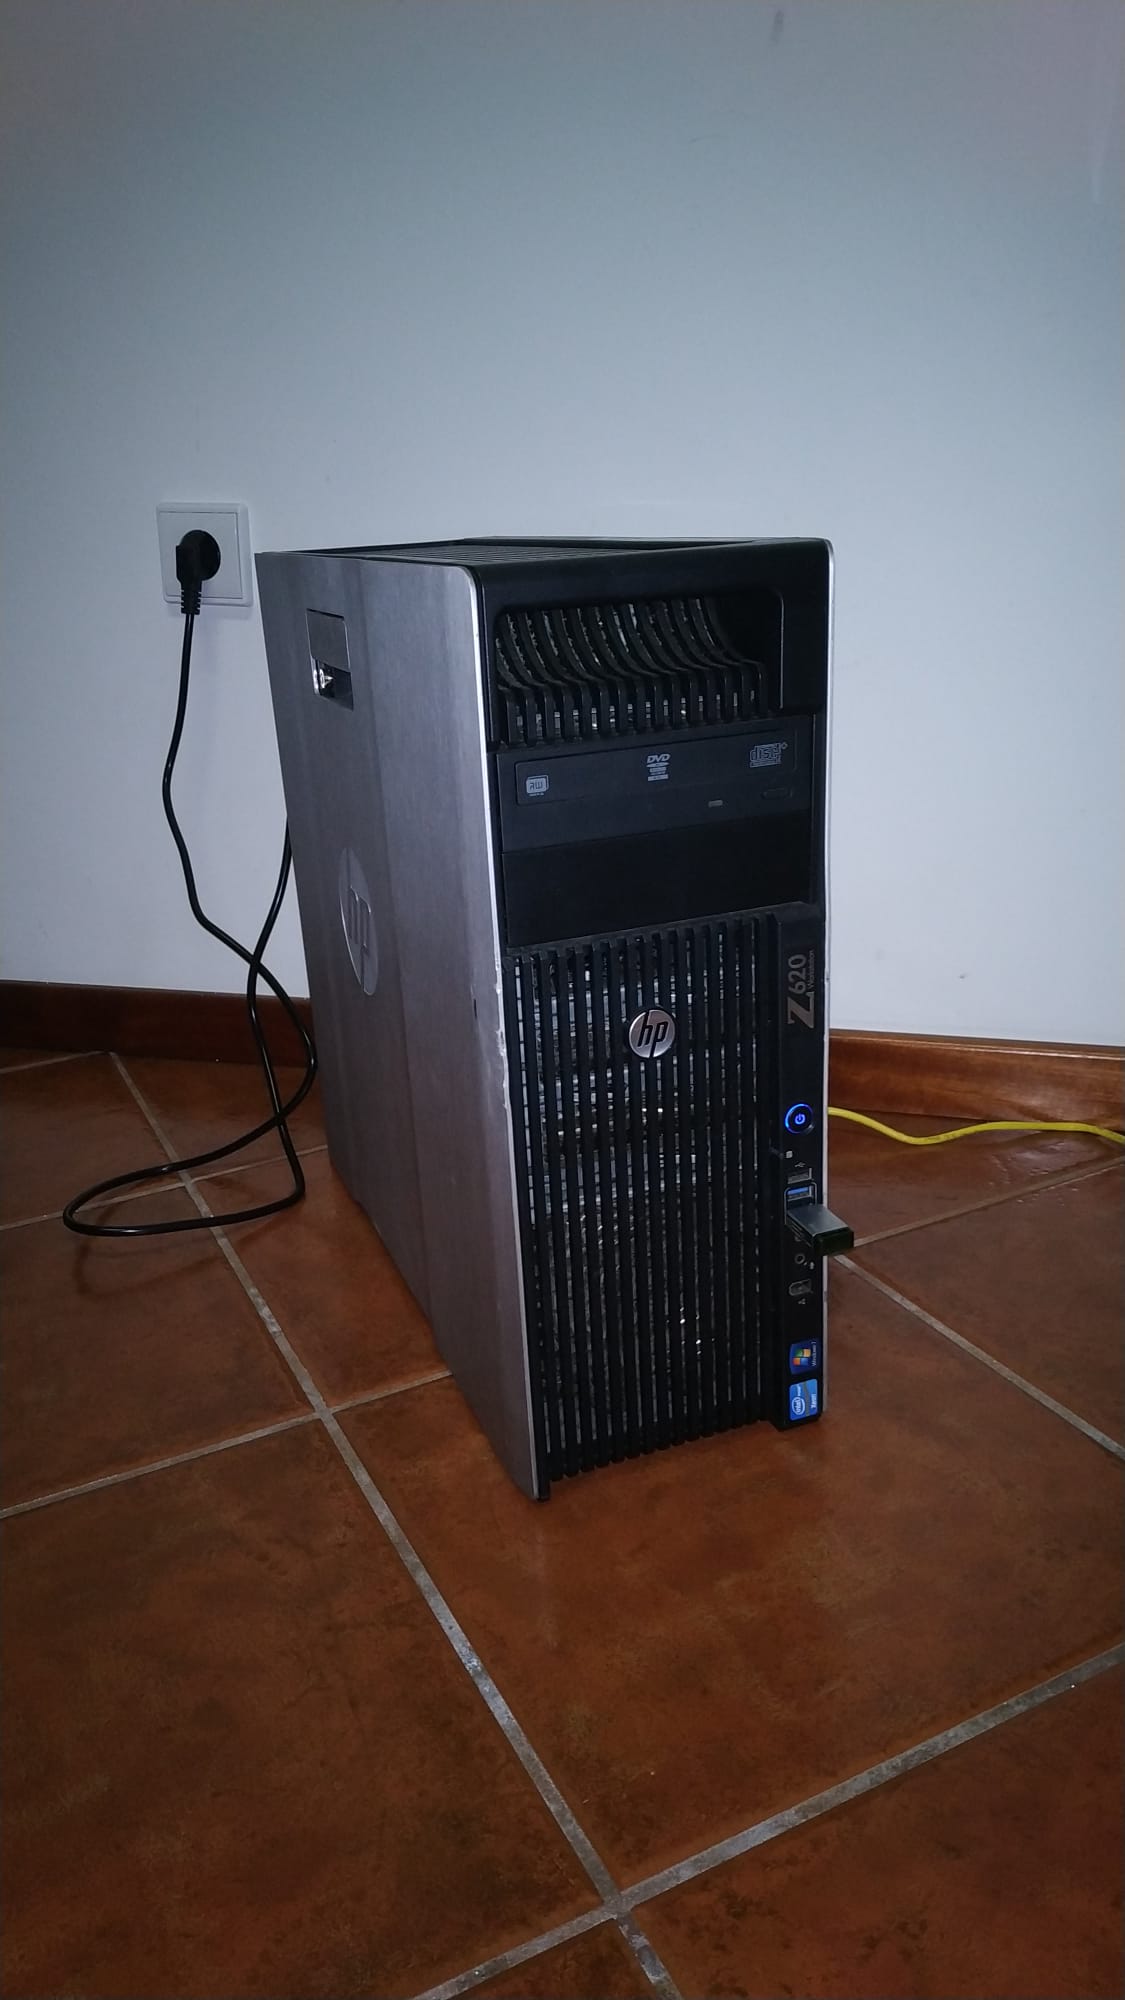
After looking for a few weeks, I found Bargain Hardware. Bargain Hardware is an awesome website with realy cool prices. I was looking for a Dell product after reading Reddit’s reviews but I only found rack servers and a rack server would not fit since I dont have a rack. So I moved to HP products and found HP Z620. Two weeks have passed by and the server had arrived.
HP Z620 Specifications
| Hardware | Brand |
|---|---|
| CPU | 2x Xeon E5-2670 2.60GHz Eight 8-Core |
| RAM | 24 GB RAM 1600MHz Kingston |
| GPU | ATI Radeon HD-3470 256 MB GDDR2 |
I added two Western Digital 500 GB HDDs and one Samsung Evo 500 GB SSD that I had in another workstation.
Then I needed to choose between ESXi or Proxmox. After reading some tips from a few forums I choosed ESXi for two reasons. First I could run ESXi from a usb stick since ESXi OS goes to RAM on boot making almost no read/writes into the usb stick and the second reason was that VMware is well known and has a bigger community making easier to find help online.
Then I had to see if the hardware of the server was compatible with ESXi, and it wasn’t (NIC was not compatible) but then I found some custom ESXi ISOs. The next step was to make a bootable usb using the custom iso and for that I used etcher.
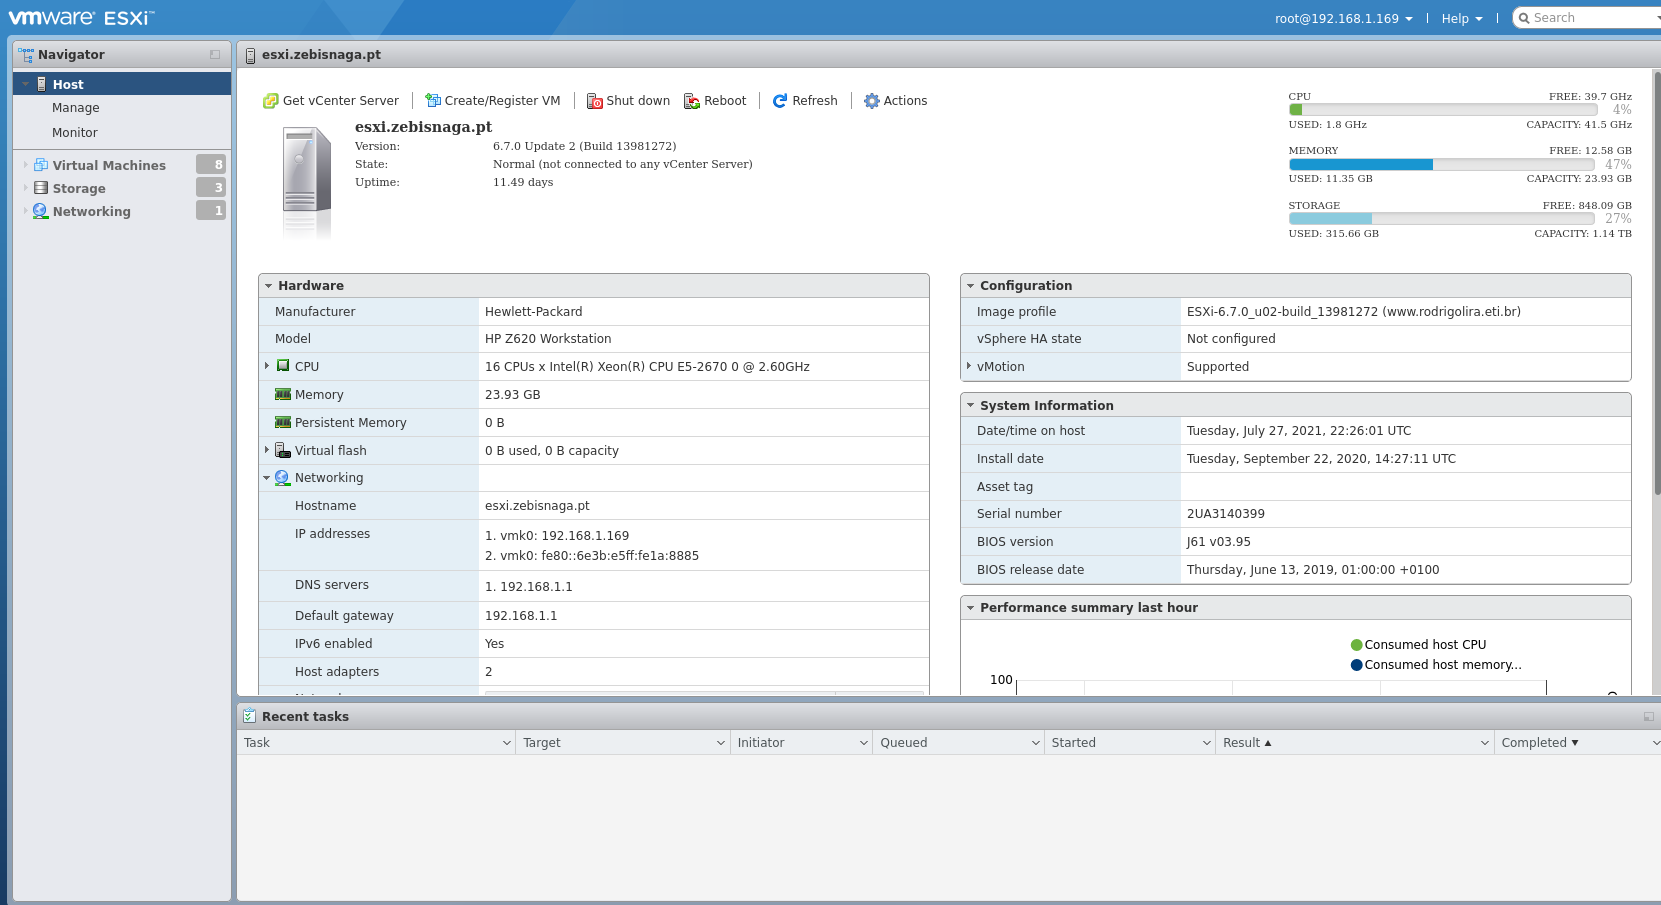
ESXi boots up and the only thing I needed to change was the ip address and make sure the NIC was working properly with the custom iso (I could see the NIC was working because it reached my home router).
After making that, the server was up and running like a charm and the next step was to create some VMs.
Backup ESXi Host
Having healthy ESXi hosts is a key to success when running virtual machines. That’s why it is better to back up ESXi configuration. Thus, if something goes wrong with an ESXi host, its configuration can be restored in a few minutes without spending a lot of time to configure an ESXi server from scratch.
Using ESXi Command Line To Backup ESXi Host
ESXi configuration is saved every hour automatically to the /bootblank/state.tgz file. So I needed to run two commands, one to do the backup and the other one to get a link to the specific backup.
vim-cmd hostsvc/firmware/sync_config
vim-cmd hostsvc/firmware/backup_config
Then I downloaded the tgz file stored in /scratch/downloads.
Automate The Backup
Create a directory to store backup files on your ESXi datastore
mkdir /vmfs/volumes/datastore1/ESXi_backup
Create a script to backup ESXi configuration
vi /vmfs/volumes/datastore1/ESXi_backup/esxi_backup.sh
Add the following lines to the script
vim-cmd hostsvc/firmware/sync_config
vim-cmd hostsvc/firmware/backup_config
find /scratch/downloads/ -name \*.tgz -exec cp {} /vmfs/volumes/datastore1/ESXi_backup/ESXi_config_backup_$(date +'%Y%m%d_%H%M%S').tgz \;
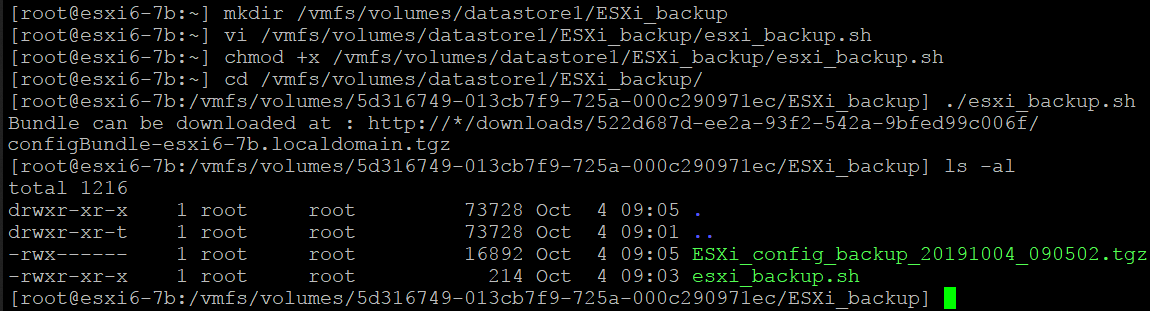
Make the script executable
chmod +x /vmfs/volumes/datastore1/ESXi_backup/esxi_backup.sh
Run the script
cd /vmfs/volumes/datastore1/ESXi_backup/
./esxi_backup.sh
Edit scheduler to make sure the backup ESXi host script is running automatically
vi /var/spool/cron/crontabs/root
Add the following string to backup everyday at 02:10 AM and save the changes
10 02 * * * /vmfs/volumes/datastore1/ESXi_backup/esxi_backup.sh
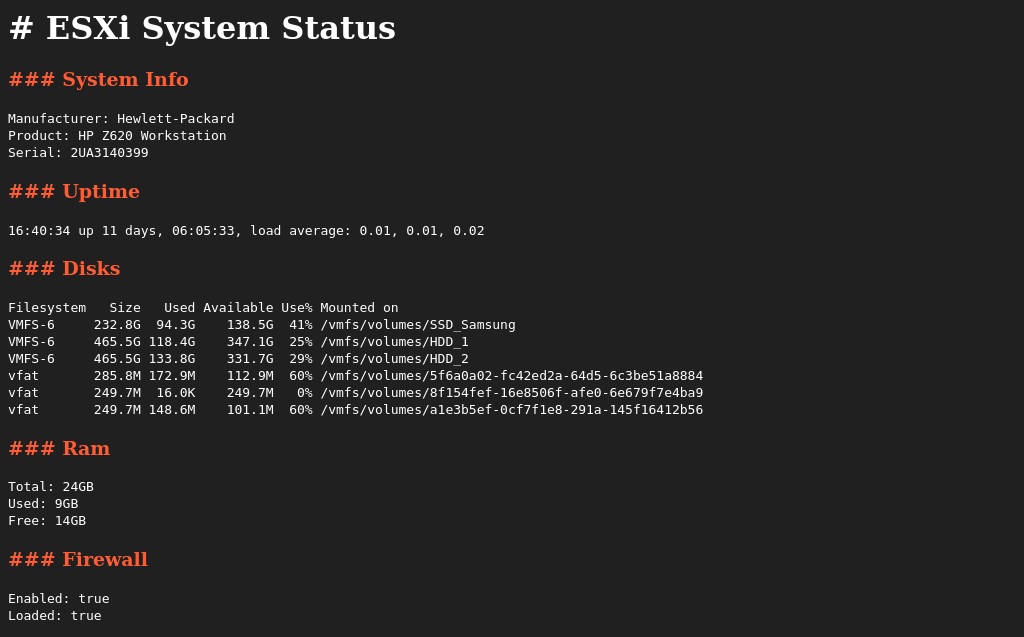
Monitoring ESXi
Even having a nice UI in VMware ESXi Web Interface I had to monitor ESXi outside of my LAN and, for security reasons, I didn’t want to make the server public to the WAN so I made a python script to help me on that job. The script can be find on my TelegramBot repository.