Introduction
During college, I used ESXi to host some virtual machines (VMs). After graduating, I transitioned to Proxmox, using the same server—an old HP Z620.
I was really pleased with that setup. It had everything I needed: VMs for my pentesting lab, LXC containers for personal projects, and a fully functional backup solution.
The problem
However, the server started failing, and by that, I mean it would shut down for no apparent reason. I tried troubleshooting everything, but the server would only run for a day before shutting down again, until eventually, it wouldn’t boot at all.
Given this situation, I started scratching my head, trying to think of possible solutions. I concluded that the best approach would be to sell the hardware and buy a new server for my Proxmox setup.
Note: It turned out that the problem was with the power supply. However, replacing the power supply would cost over 400 euros for a refurbished one, which isn’t worth it for a server that’s about 14 years old.
New server
After searching for a few weeks, I found some interesting mini computers, like the ThinkCentre M90q Gen 4.
I came across an online vendor offering a great deal, plus a 4-year warranty, which was even better.
After purchasing the new server, I planned the additional hardware I would need to create a setup similar to or even better than the one I had with the HP Z620. I decided to buy 16 GB of RAM and a 1 TB NVMe SSD.
With these upgrades, the full server specifications are as follows:
| Hardware | Spec |
|---|---|
| CPU | 20 x 13th Gen Intel(R) Core(TM) i5-13500T |
| RAM | 2 x 16GB DDR5 5600MHz Fury Impact CL40 SO-DIMM |
| STORAGE | 1 TB 3D M.2 NVMe 2280 (3500/3000MB/s) + 250 GB M.2 NVMe |
| GPU | Onboard |
I planned to use the 1 TB NVMe SSD for my VMs, as they require the most storage (specifically, Windows Server and Windows Pro). The 250 GB drive is where Proxmox is installed.
In addition to this, I also have a 2 TB external hard drive connected via USB. This drive helps reduce the size of my LXC containers and VMs by storing their larger files. It also serves as a backup destination, so it needs to be accessible via LAN.
Proxmox configuration
Previously, I had chosen the ZFS file system to work with Proxmox. However, this time I decided to use LVM (the default) to compare both setups, and so far, I am satisfied with using LVM.
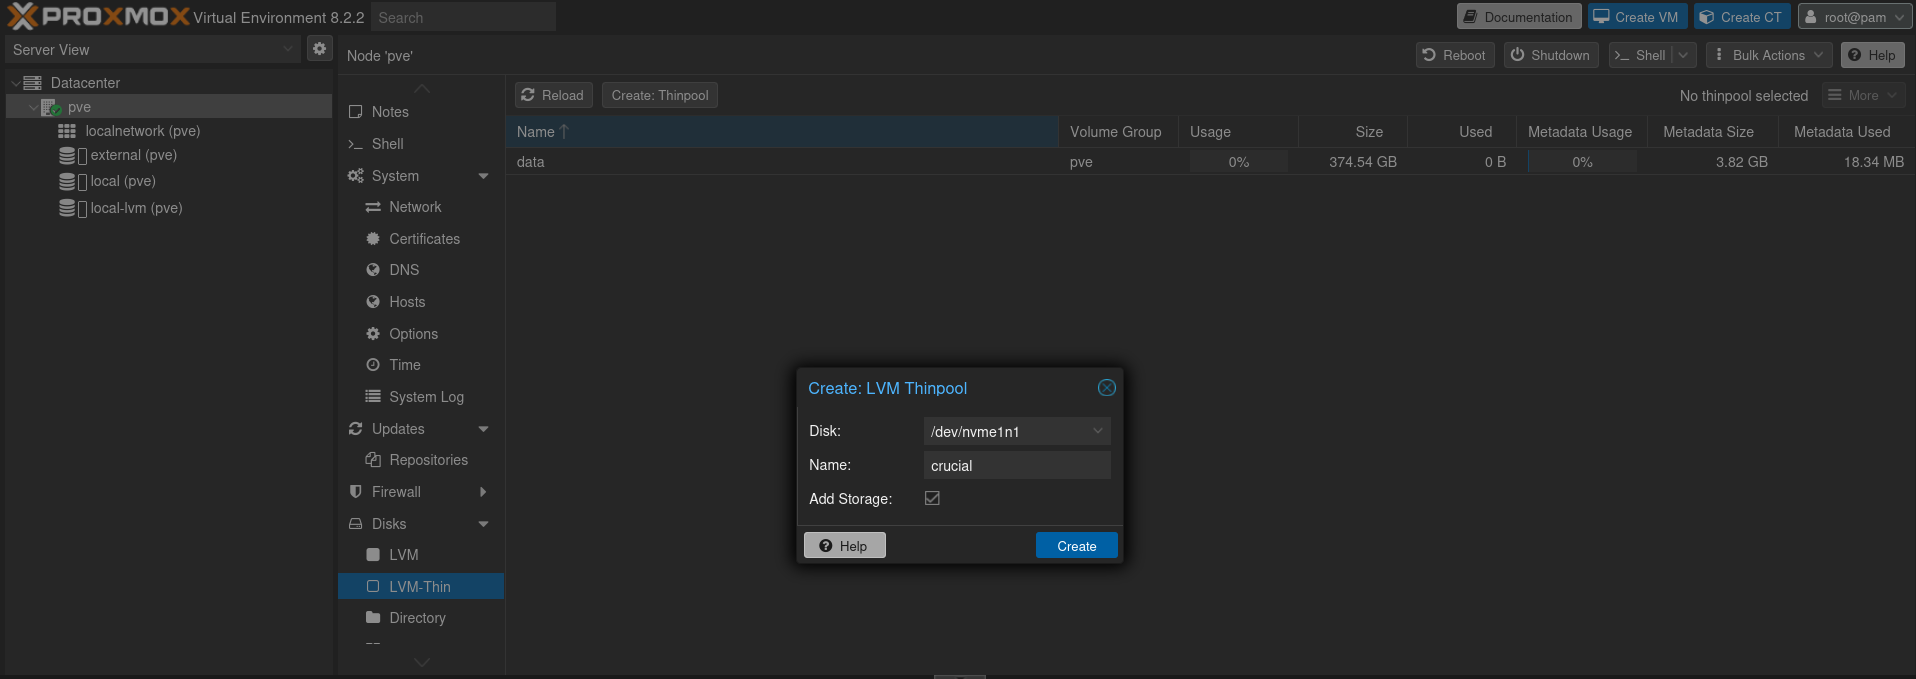
After installing the Proxmox OS on the 250 GB NVMe, I added the 1 TB NVMe as shown in the image below. Note that I configured it as an LVM Thin Pool to only occupy actual used space rather than the entire disk. This way, the storage size can grow over time as needed.
Then, I added the 2 TB external hard drive by mounting it as an additional disk.
$ mkdir /mnt/pve/external # Create a folder to mount the external hard drive
$ ls -l /dev/disk/by-uuid/* # Find disk (external hard drive) by uuid
$ echo "/dev/disk/by-uuid/<uuid> /mnt/pve/external ext4 defaults 0" >> /etc/fstab # Write the external hard drive uuid to fstab
$ mount -a # Update fstab
$ systemctl daemon-reload # Reload systemctl daemon
$ lsblk # Verify the mapping
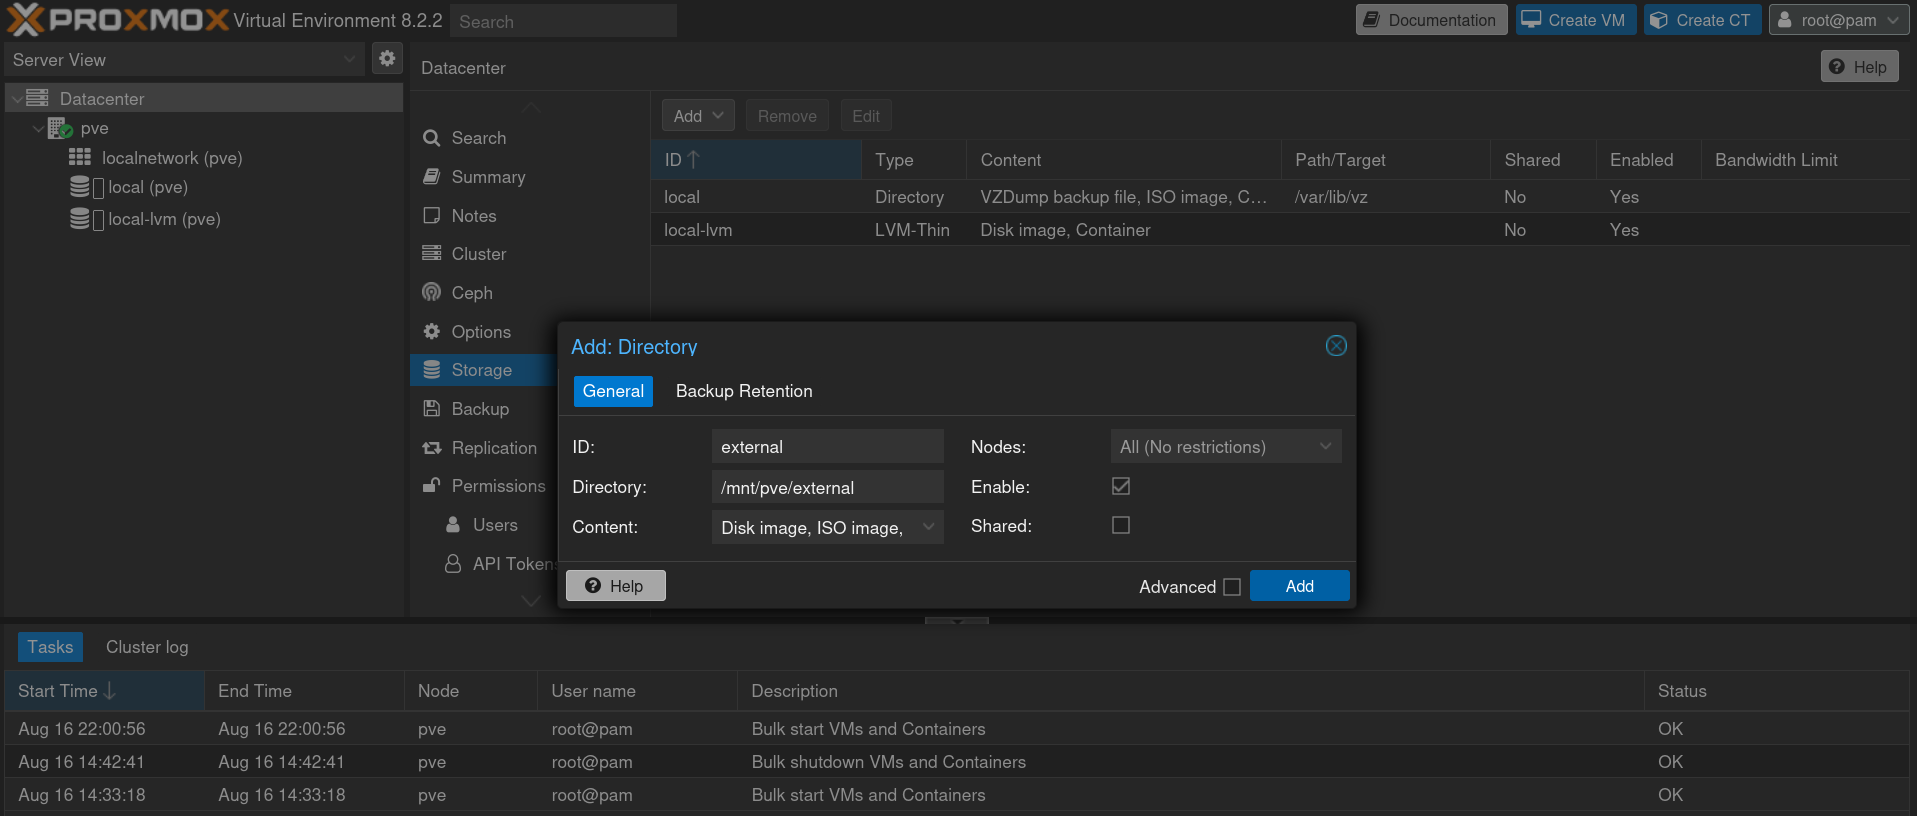
After completing all the configurations, I added the external hard drive as storage in Proxmox, as shown below.
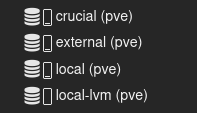
The current storage configuration is as follows:
- crucal (pve)
- Storage for VMs
- external (pve)
- Storage for backups + misc stuff + ISOs
- local (pve)
- Proxmox OS
- local-lvm (pve)
- Storage for LXC
Troubleshooting
When creating LXC containers, I like to set everything up so I don’t need to rely on the Proxmox GUI, which is why I always set up SSH keys.
However, LXCs can be tricky because if you create an unprivileged container, some utilities don’t work well. Additionally, using SSH in an LXC that doesn’t have nesting enabled can be very slow. I’ve found on some forums that this issue is related to DNS problems.
To fix this, I create a privileged LXC without nesting and then go to Proxmox and run the command pct set <container id> -features nesting=1. This completely resolves the SSH behavior issues.
Restoring
The restore process for the LXC went smoothly. I created a new LXC container and used rsync to transfer the backup configuration files, which worked perfectly.
The situation with the VMs were different, as I hadn’t been backing them up due to limited space in my previous setup.
This experience made me realize that I need to revise my approach with the new setup to better prepare for scenarios similar to those I encountered with the old server.
Future
With these considerations in mind, I started developing a new backup plan—one that is more robust yet cost-effective.
In the next blog post, I’ll explain my thought process and outline my new approach for a refined backup mechanism. This new system will back up everything and ensure easy restoration, all while maintaining a reasonable amount of space on a new machine (spoiler alert:)).
Yes, I plan to use a pre-built NAS with affordable, compact components to back up everything I consider important. This will include a new version of the gbackup utility and a new, efficient computer that will serve as the NAS.